
The Simple Elegance Shawl is a two row repeat that creates a gorgeous textured stitch pattern that is different on both sides! You can choose which side you like better!

Some of the stitches required to make this triangle shawl are the chain, single crochet, double crochet, front post double crochet, and cluster stitch. There is a video stitch tutorial available if you aren’t familiar with these stitches or if you’d just like to crochet along with me!

The fringe and beads are optional, but I thought that the pearl beads gave this piece an extra touch of elegance, perfect for any formal occasion. There is also a tutorial video available for adding a simple fringe and beads to any crochet project. The link is in the pattern below.

If you’re interested, the dress is from JC Penney, Summer 2023.

Simple Elegance Shawl
Materials Used:
- 5 skeins of Yarn Bee Yarntopia in Scarlet – 312 yds/4 oz – 285 m/113 g (size 2 fine weight yarn) or any yarn you wish!
- G (4.25 mm) Crochet Hook
- Tapestry Needle
- Beads (Optional)
Finished Size Approximately:
40” H x 81” W (101.6 cm H x 205.74 cm W)
Gauge:
Not Important
Abbreviations:
ch(s) – chain(s)
st(s) – stitch(es)
sc – single crochet
dc – double crochet
FPdc – front post double crochet
sl st – slip stitch
sk – skip
sp – space
Notes:
- You can create any size shawl you prefer by simply adding or subtracting rows – child size to 5XL+.
- You can use any size yarn you wish. Just keep in mind that if you use a heavier weight yarn, your finished product will be wider and longer than the example and vice versa if you use a smaller weight yarn. But, any yarn will work! Simply stop when your shawl is your desired size.
- Because of the nature of the stitches, the shawl will look different on either side.
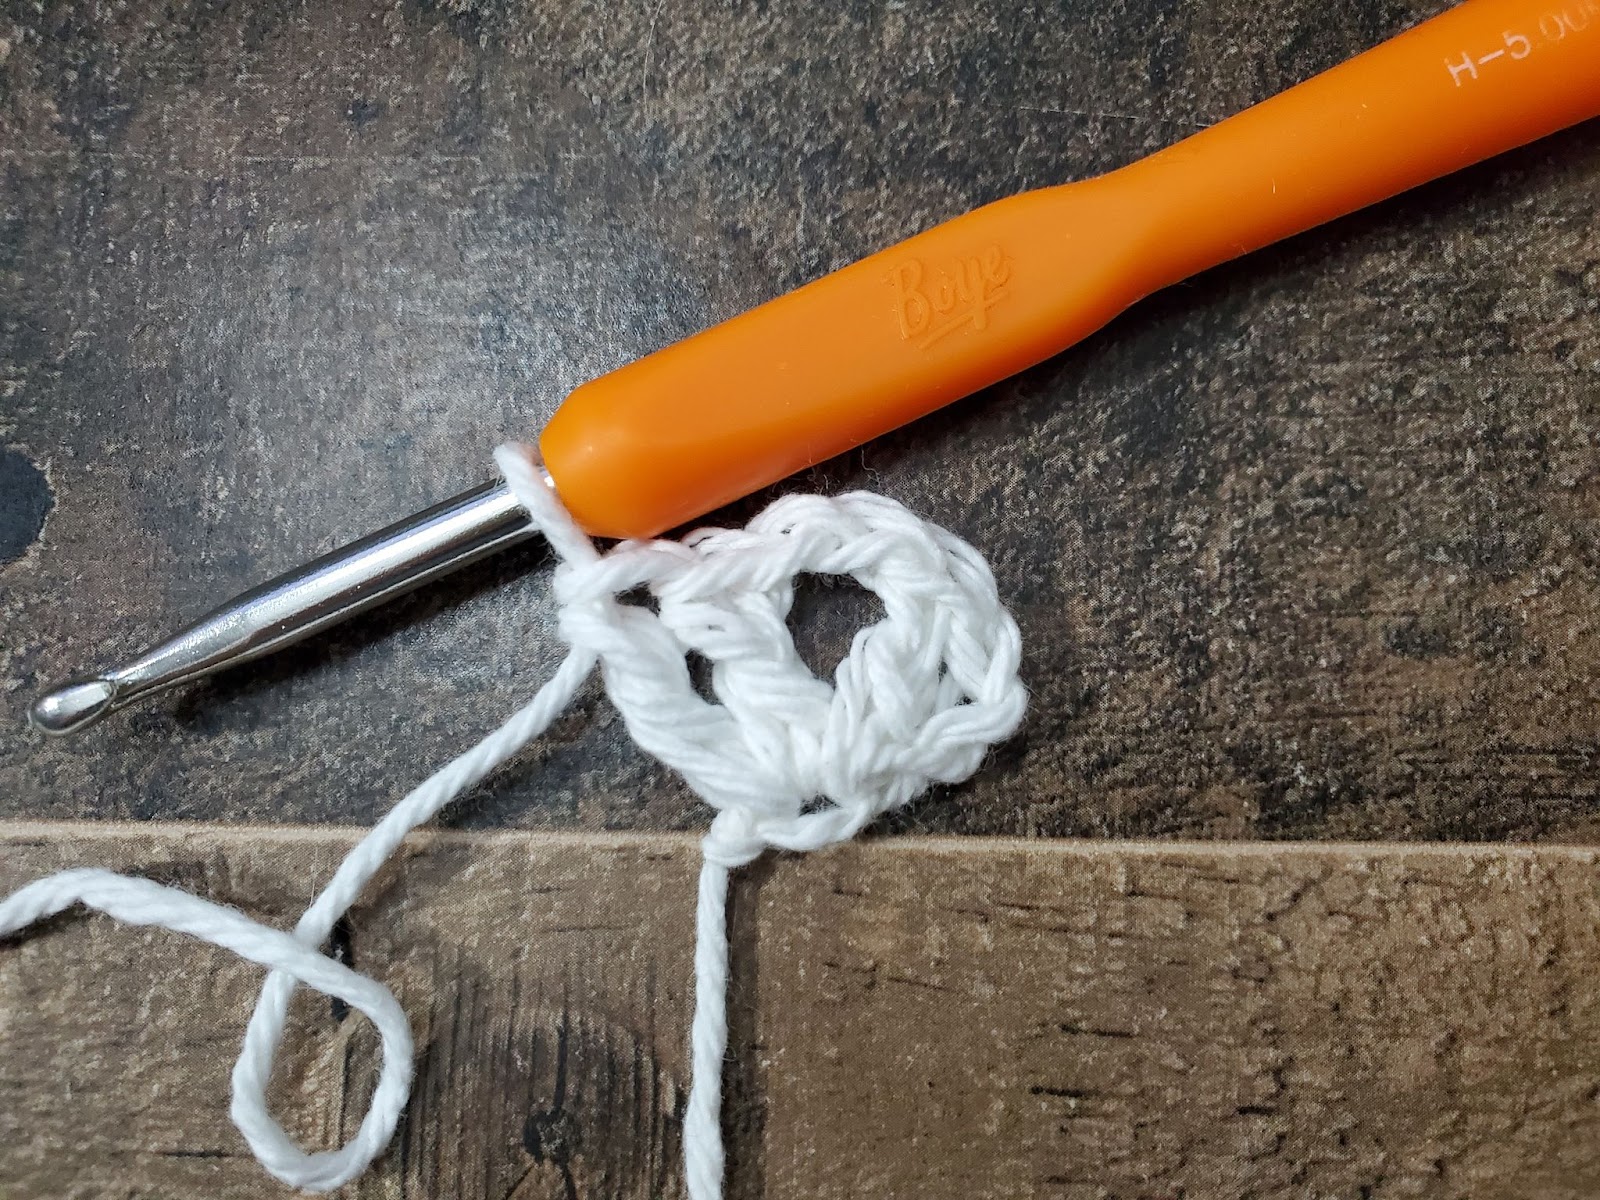
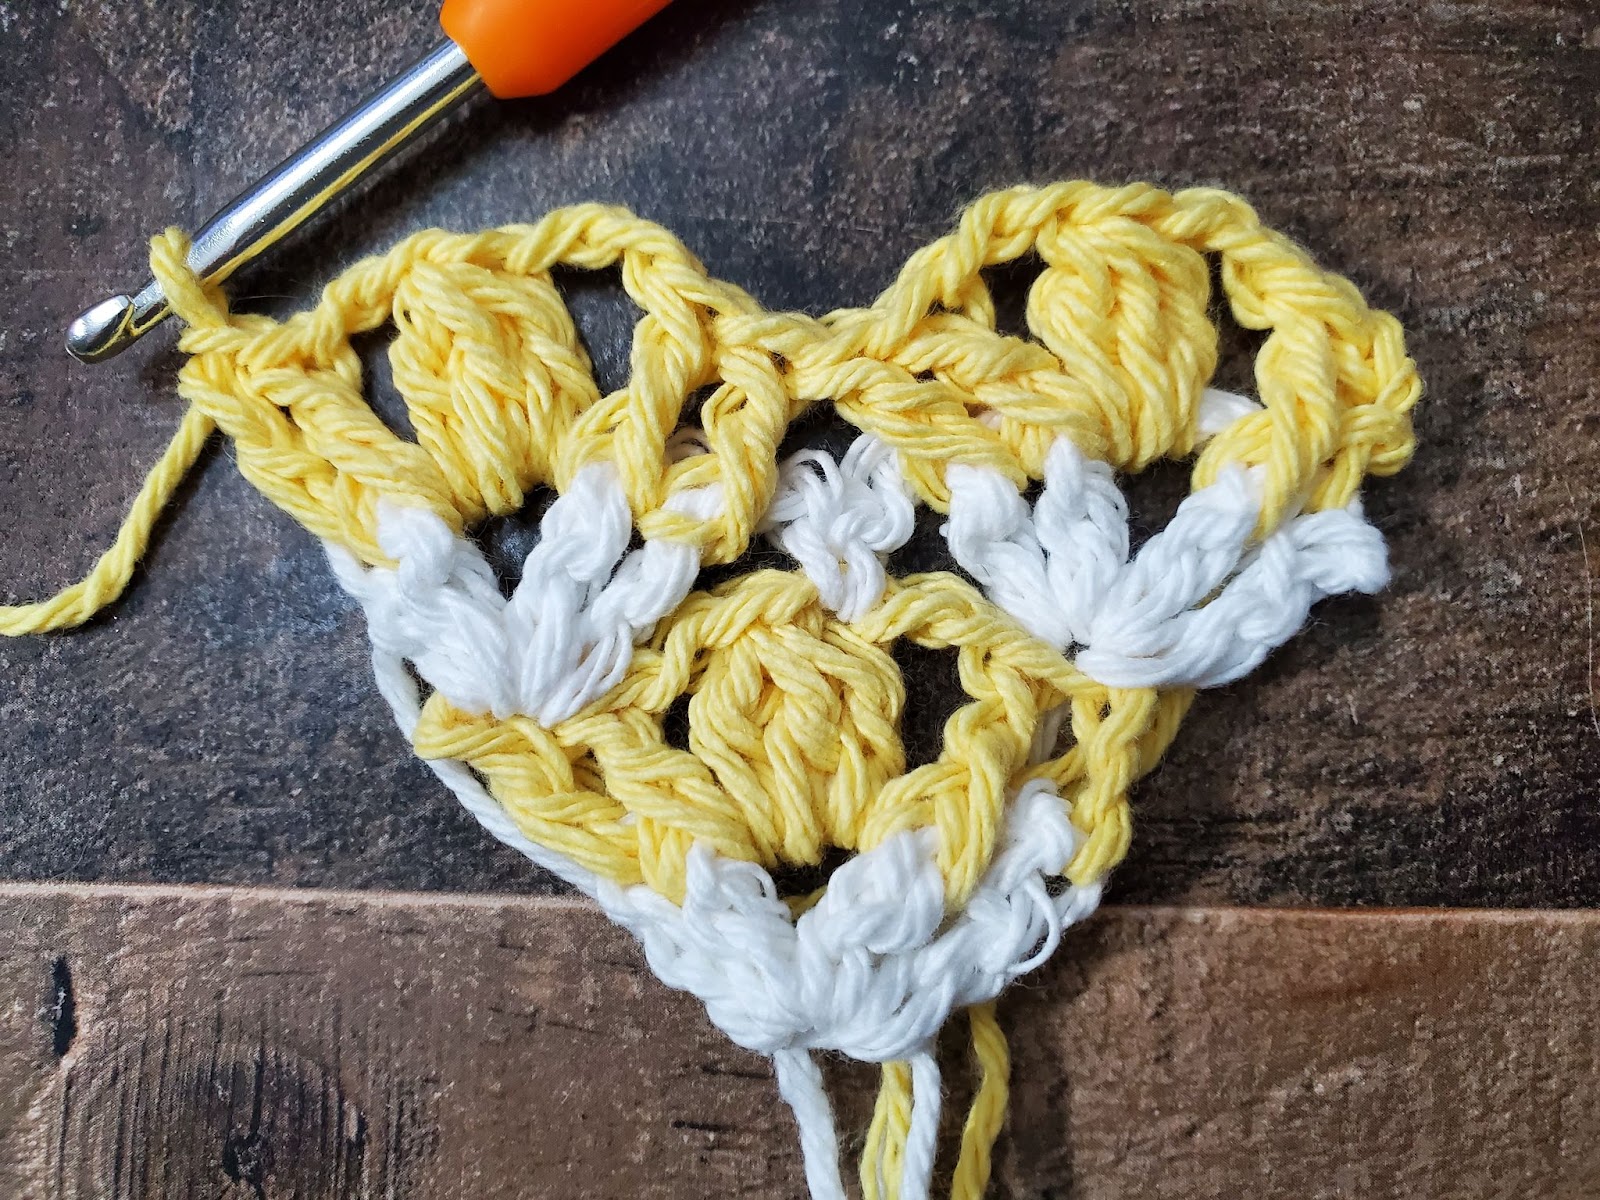
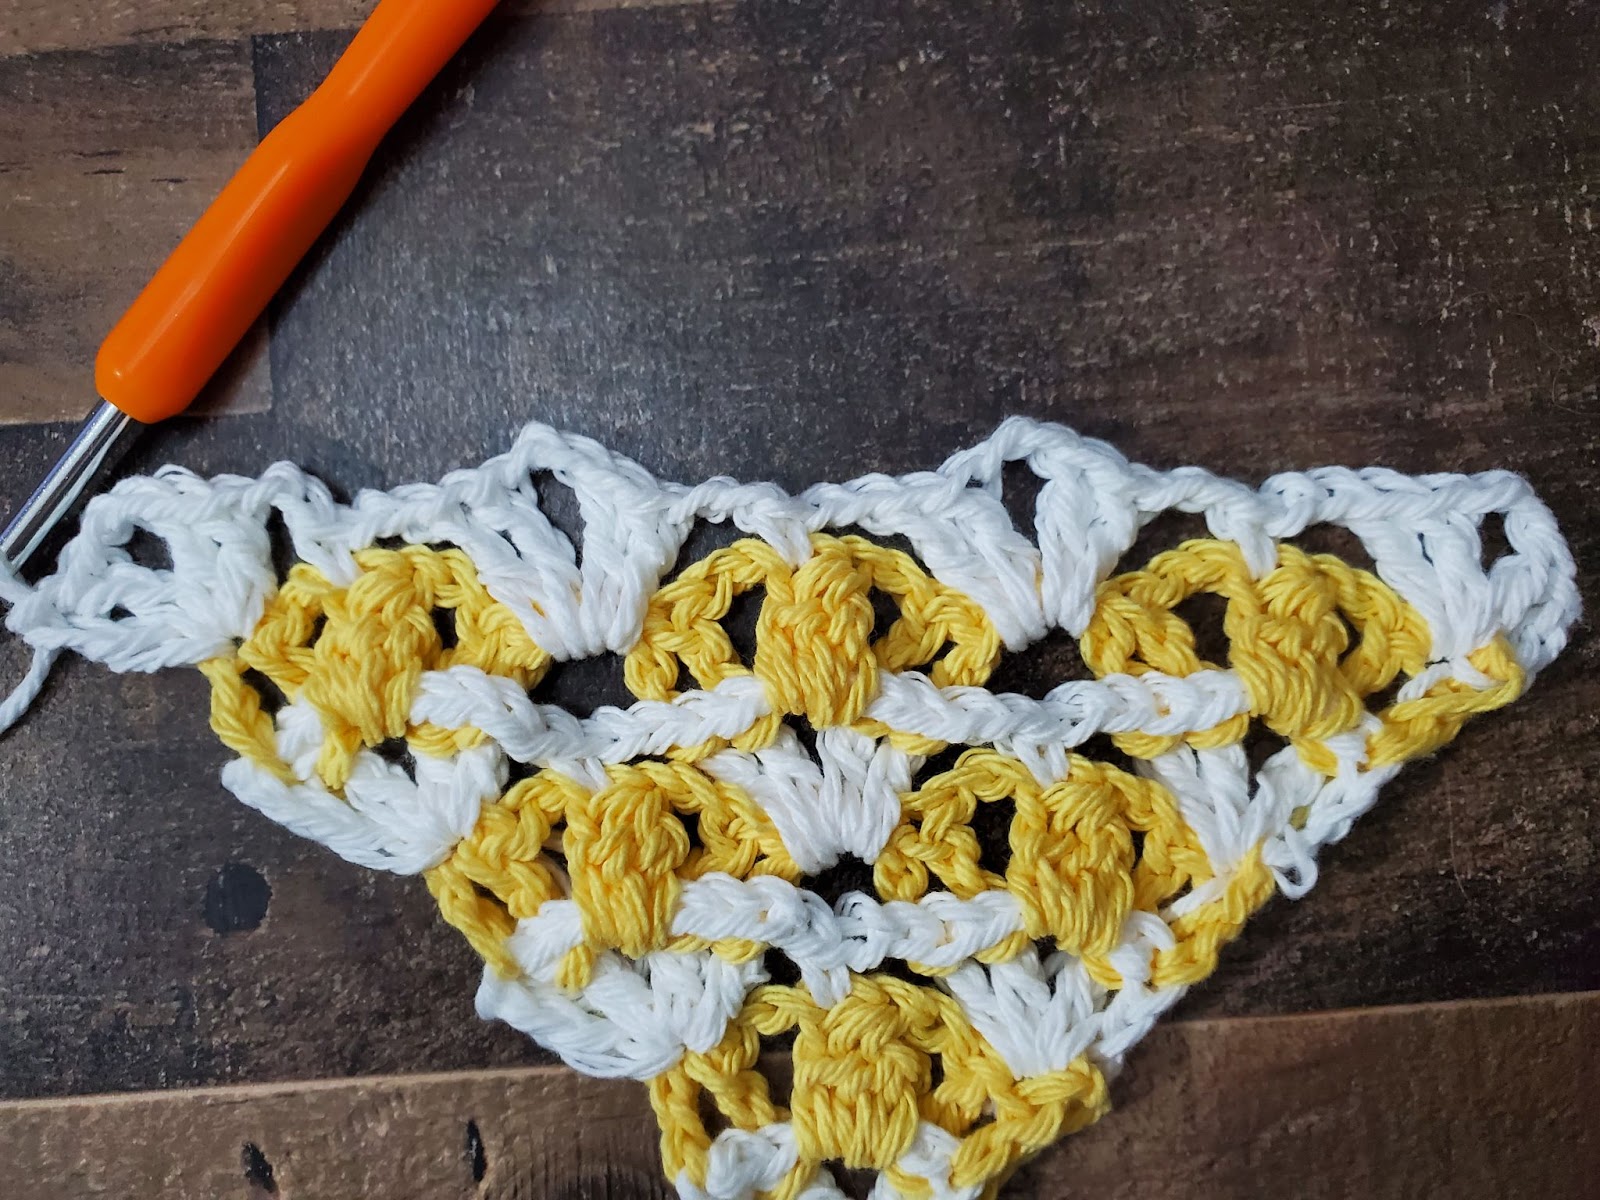
- The tutorial photos show each row in a different color to help you differentiate between the rows and placement of stitches.
- You can use any border that you wish.
- The fringe and beads are optional.
- A video stitch tutorial can be found at this link.
*** American crochet terms used throughout. ***
Special Stitches:
Cluster Stitch – YO, insert hook in st, YO, draw back through st, YO, draw through 2 loops on hook, (YO, insert hook back into same st, YO, draw back through st, YO, draw through 2 loops on hook) twice, YO, draw through all 4 loops on hook, ch 1.
Front Post Double Crochet (FPdc) – YO, insert hook from the front of your work around the dc from the previous row from right to left. YO and draw back through, pulling up tall. YO and draw through 2 loops, YO and draw though 2 loops.
Instructions:
Row 1: Ch 4, (dc, ch 2, 2 dc) all in 4th ch from hook. Turn.
Row 2: Ch 3 (counts as dc here and throughout), FPdc around next st, ch 2, cluster st in ch-2 sp, ch 2, FPdc around next st, dc in last st. Turn.
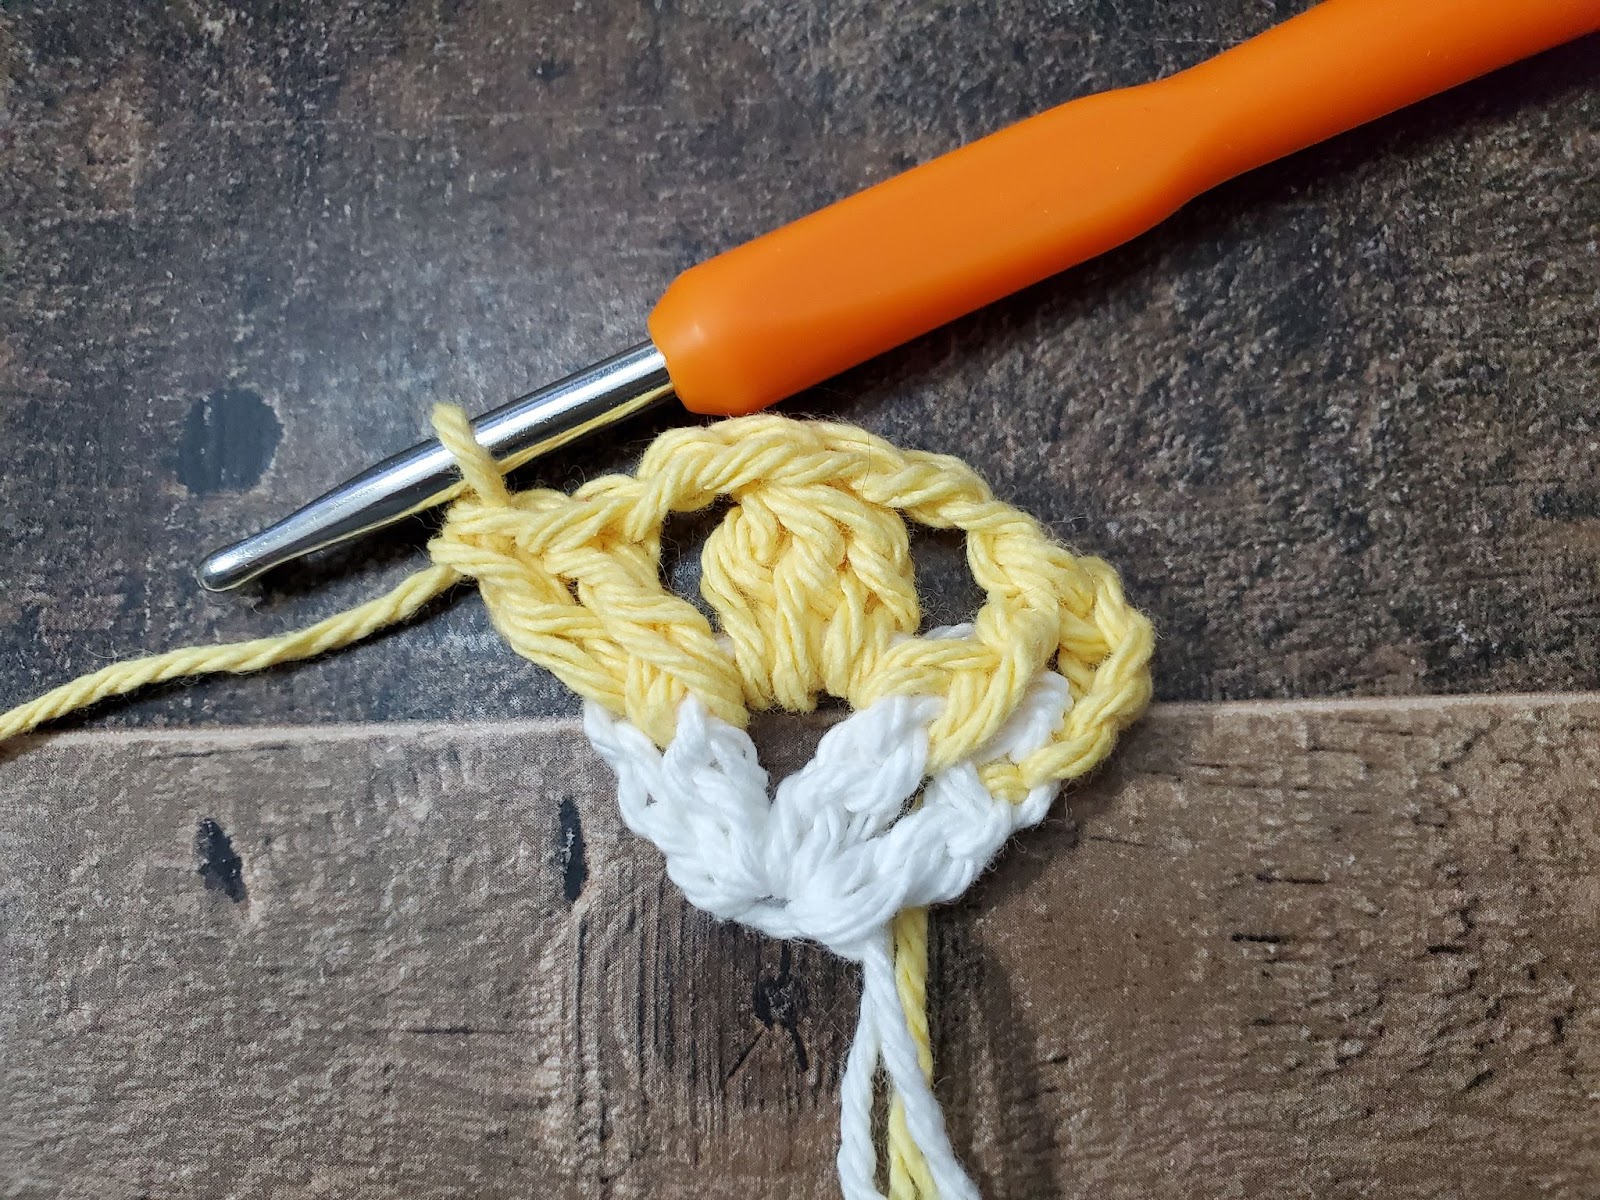
Row 3: Ch 3 (counts as dc here and throughout), (dc, ch 2, 2 dc) all in first st, ch 2, sk next ch-2 sp, sc in cluster st, ch 2, sk next ch-2 sp, sk next st, (2 dc, ch 2, 2 dc) all in last st. Turn.
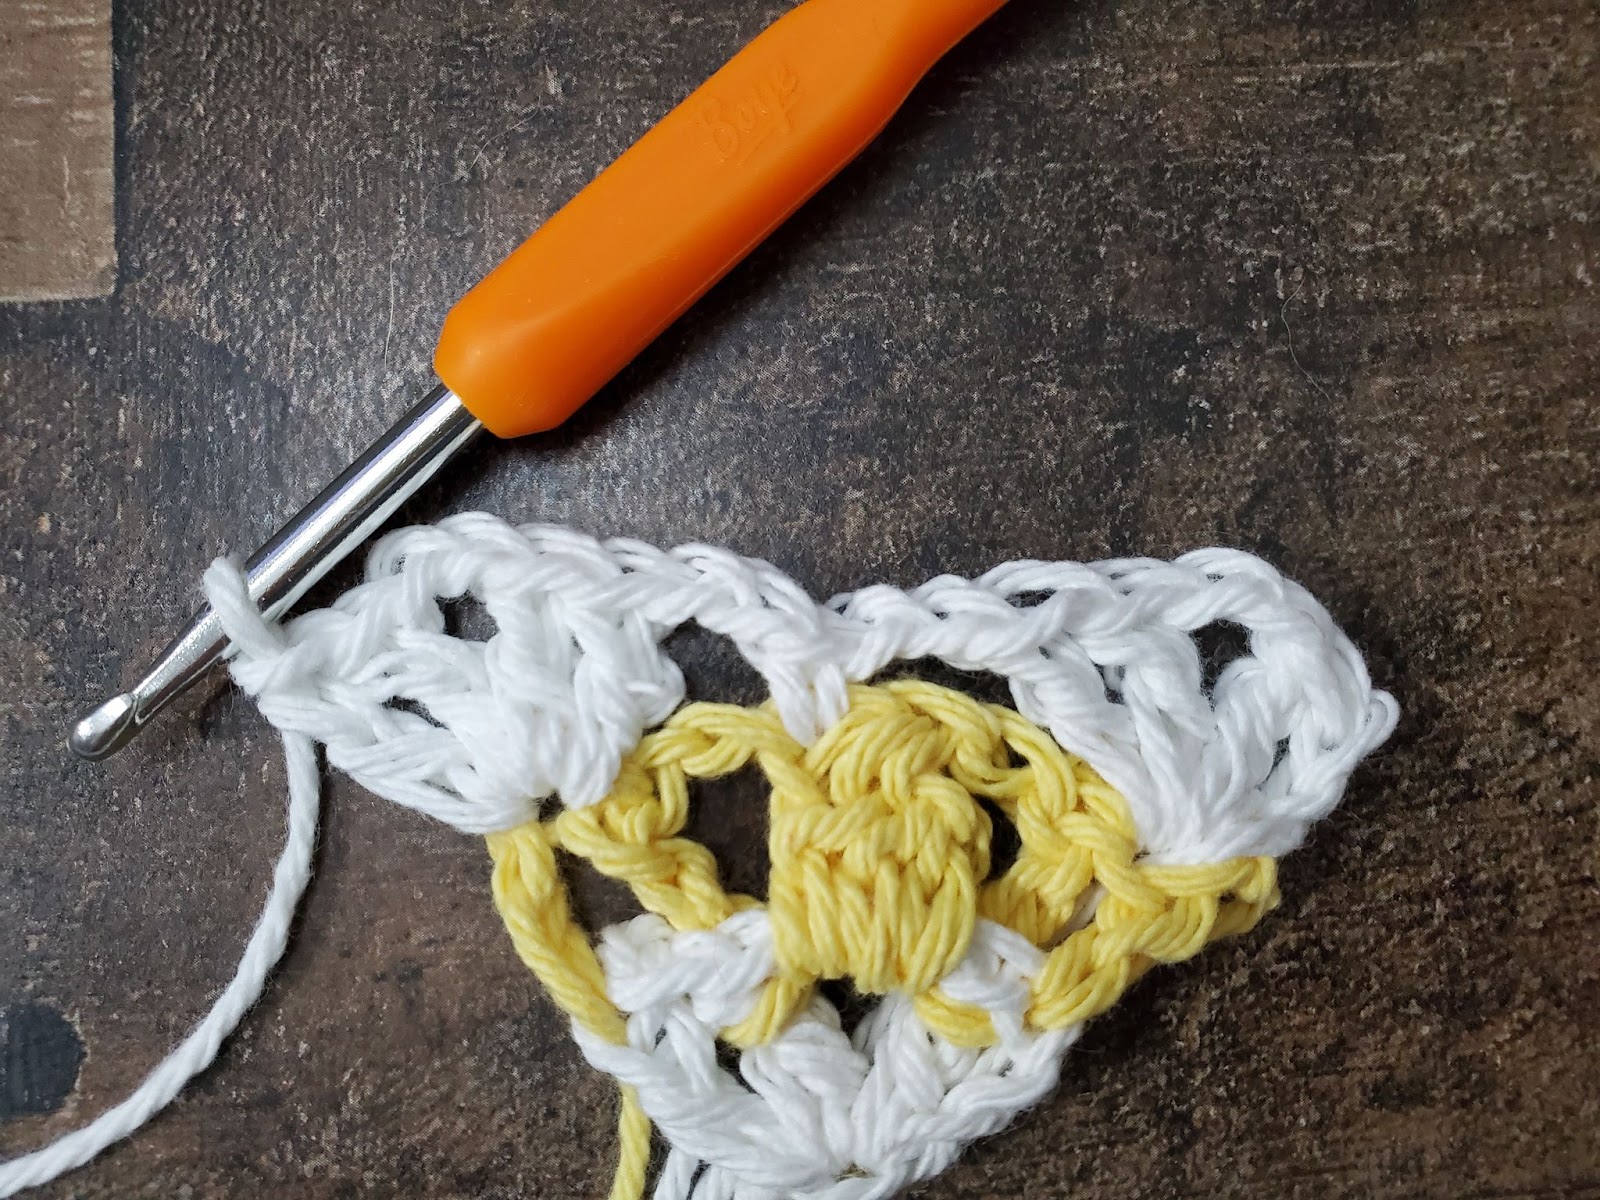
Row 4: Ch 3, FPdc around next st, ch 2, cluster st in ch-2 sp, ch 2, FPdc around next 2 sts, sk ch-2 sp, sk next st, sk ch-2 sp, FPdc around next 2 sts, ch 2, cluster st in ch-2 sp, ch 2, FPdc around next st, dc in last st. Turn.
Row 5: Ch 3, (dc, ch 2, 2 dc) all in first st, ch 2, sk next st, sk ch-2 sp, sc in cluster st, ch 2, sk ch-2 sp, sk 2 sts, (2 dc, ch 2, 2 dc) in sp between group of 4 dc’s from previous row, ch 2, sk 2 sts, sk ch-2 sp, sc in cluster st, ch 2, sk ch-2 sp, sk next st, (2 dc, ch 2, 2 dc) all in last st. Turn.
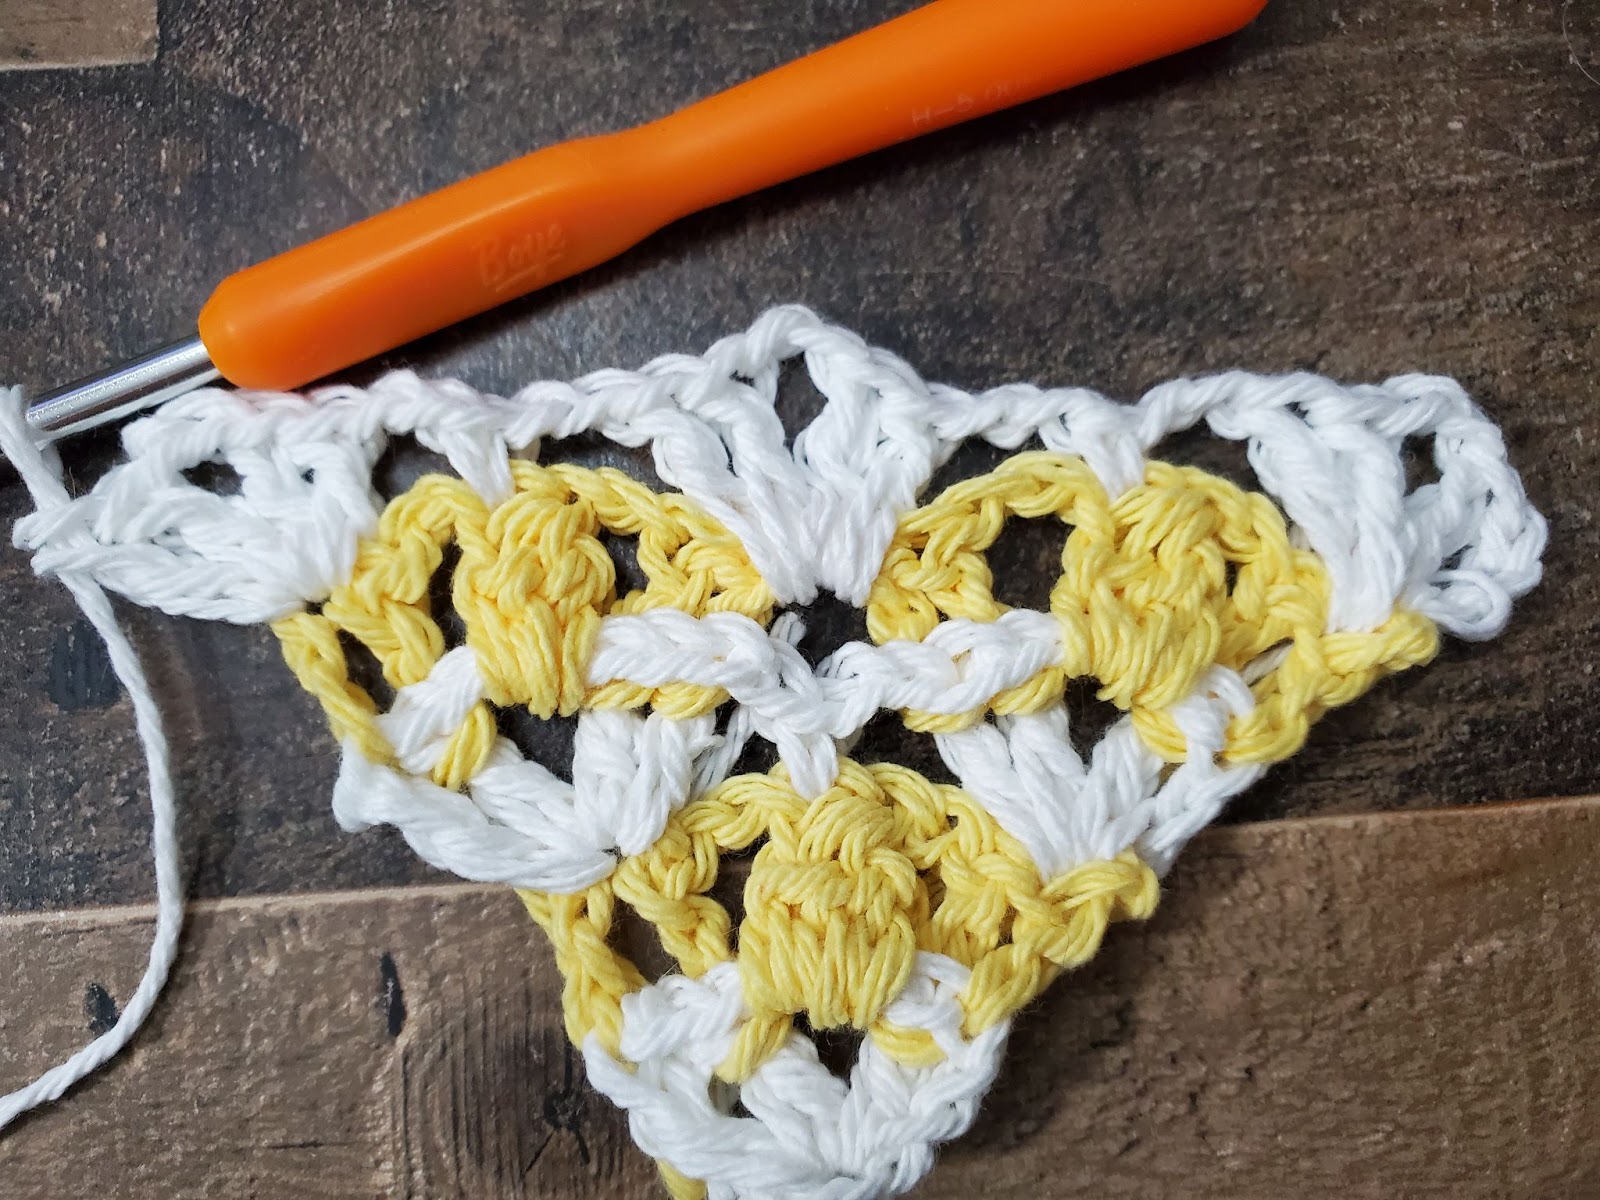
Row 6: Ch 3, FPdc around next st, ch 2, cluster st in ch-2 sp, ch 2, FPdc around next 2 sts, sk ch-2 sp, sk next st, sk ch-2 sp, FPdc around next 2 sts, ch 2, cluster st in ch-2 sp, ch 2, FPdc around next 2 sts, sk ch-2 sp, sk next st, sk ch-2 sp, FPdc around next 2 sts, ch 2, cluster st in ch-2 sp, ch 2, FPdc around next st, dc in last st. Turn.
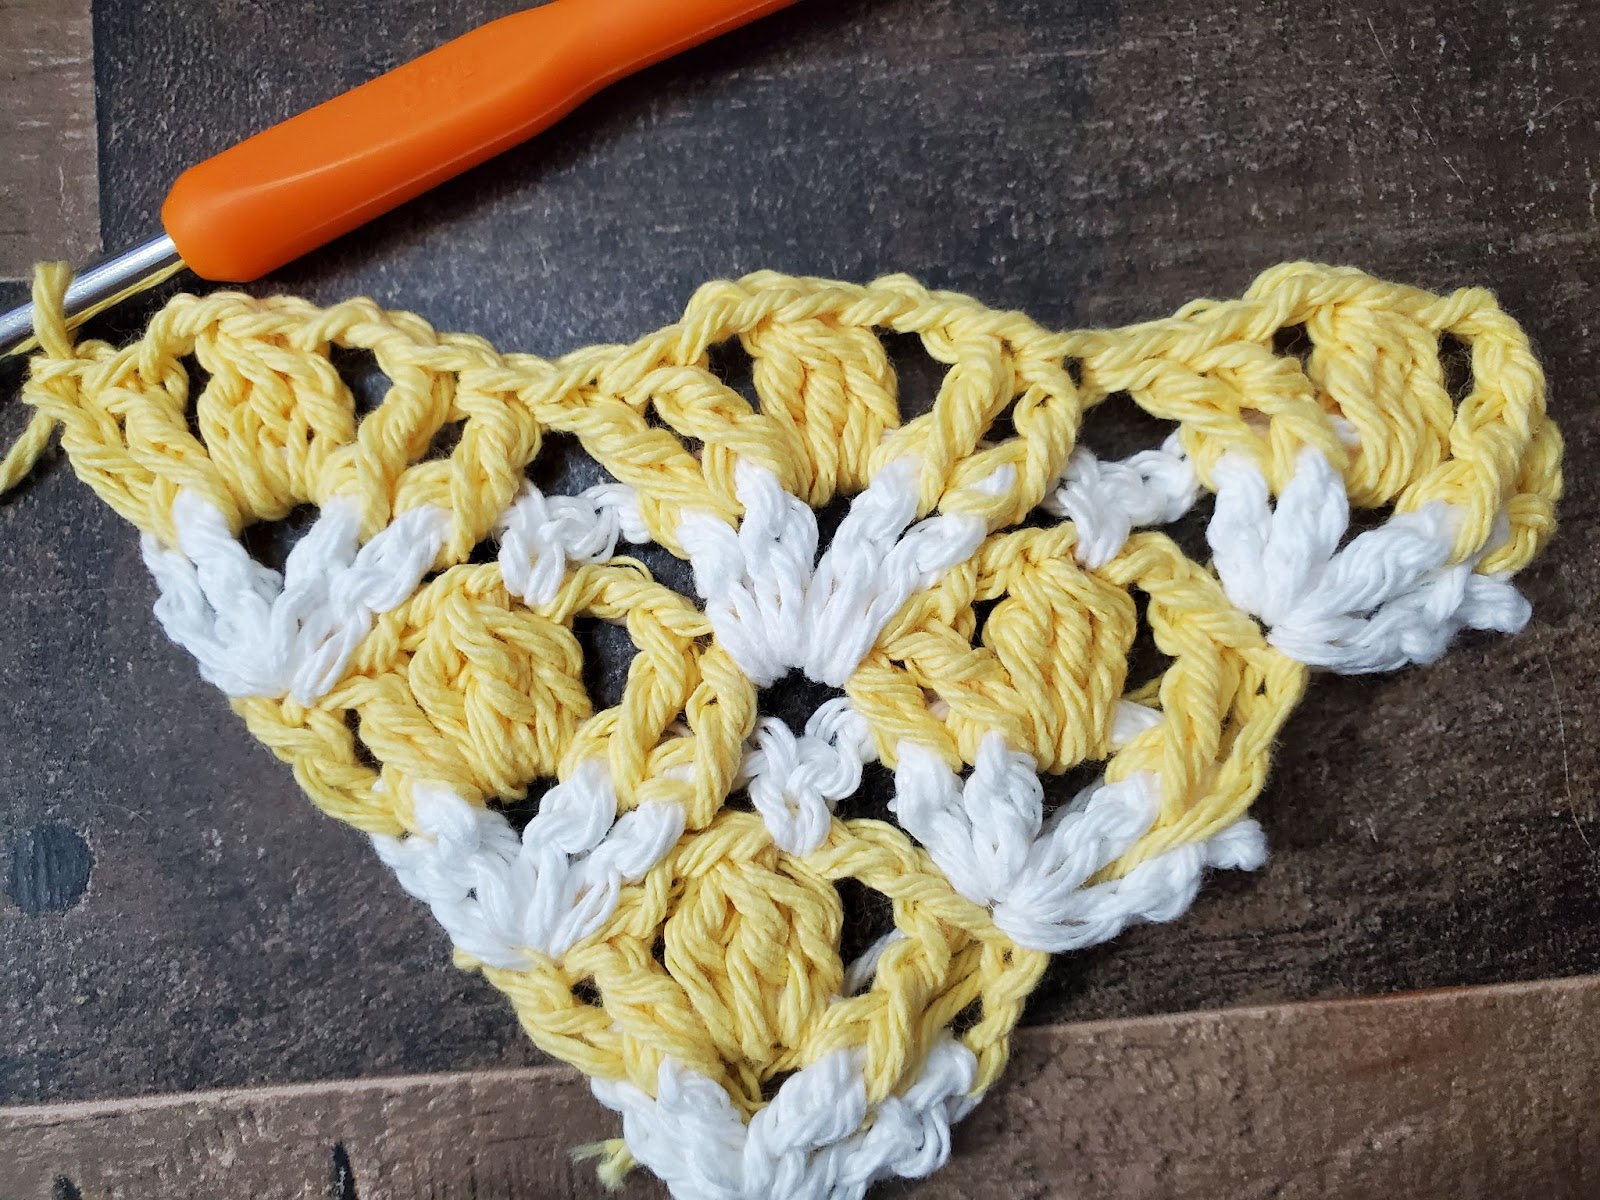
Row 7: Ch 3, (dc, ch 2, 2 dc) all in first st, ch 2, sk next st, sk ch-2 sp, sc in cluster st, ch 2, sk ch-2 sp, sk 2 sts, (2 dc, ch 2, 2 dc) between 2nd and 3rd dc from previous row. *ch 2, sk next 2 sts, sk ch-2 sp, sc in cluster st, ch 2, sk ch-2 sp, sk 2 sts, (2 dc, ch 2, 2 dc) between 2nd and 3rd dc from previous row.* Repeat from * to * across. Work last (2 dc, ch 2, 2 dc) all in last st. Turn.
Row 8: Ch 3, FPdc around next st, ch 2, cluster st in ch-2 sp, ch 2, FPdc around next 2 sts, *sk ch-2 sp, sk next st, sk ch-2 sp, FPdc around next 2 sts, ch 2, cluster st in ch-2 sp, ch 2, FPdc around next 2 sts* Repeat from * to * across working only a dc (instead of a FPdc) in final st of row. Turn.

Repeat Row 7 and Row 8 for pattern until shawl is desired length or for 87 rows as the example is done.
Border
Round 1: Don’t finish off after final row. Turn your work. Sc evenly across the top of shawl, work 3 sc in corner. Sc evenly to bottom tip, work 3 sc in bottommost st of tip. Sc evenly along final edge of shawl. Work 2 sc in corner. Sl st in first st made of round. Finish off. Weave in ends.
Beads and fringe are optional.
Video Tutorial Links:
★ Video stitch tutorial for Simple Elegance Shawl pattern.
★ How to evenly work sc around a project.
★ How to create and add a simple fringe and beads.
I hope you’ve enjoyed the Simple Elegance Shawl pattern! Here are the links to purchase the written pattern from various stores:
***Click here for the ad-free PDF’s from Etsy***
***Click here for the ad-free PDF’s from Ravelry***
***Click here for the ad-free PDF’s from LoveCrafts***
Don’t forget to follow along with me on Pinterest and Instagram to stay up to date on all my new patterns!
Thanks for stopping by!
